
What is a Cronjob?
Cronjobs are tasks we can schedule to run at a specific time or interval. They are commonly used in server-side applications to automate recurring tasks, such as sending emails, updating databases, and processing scheduled events.
For example, let's say we want to generate a report and email our customers daily at 8:00 AM. To do this, we can create a cronjob that runs the report generation script daily at 8:00 AM and sends out the email.
We can take this example further and say that we want to send out the email address at our customer's local time. To do this, we can create a cronjob that runs every hour, checks the local time of our customers, and sends out the email if it's 8:00 AM in their time zone.
Just via a simple cronjob, we solved a complex problem and potentially increased the open rate of our emails by sending them at the right time. This is just one example of how powerful cronjobs can be.
How to use Cronjobs in Node.js
Unlike what you may expect, cronjobs are very easy to use in Node.js, and I'm willing to bet that you have already used them in one way or another without even knowing it. So before we dive into the details, let me show you a very simple way of creating periodic tasks in Node.js.
You've probably seen this code before. It's a simple way of running a task every minute that prints "Hello World!" to the console. Of course, this is a very trivial example, but it shows how we can use the setInterval function to create a cronjob in Node.js.
However, this is basic and doesn't allow us to schedule tasks at different intervals or specific times. To do that, we can use a third-party library, such as node-cron, or we can use the built-in cron module. These libraries are designed specifically for creating cronjobs in Node.js and provide us with a lot more flexibility.
In this article, we'll use the node-cron library to create cronjobs in Node.js.
Installing node-cron
We need to install the node-cron library to get started. We can do this by running the following command in our terminal:
Once we have installed the library, we can then import it anywhere in our project:
Create our first cronjob
Now that we have everything set up, we can create our first cronjob. First, let's set up the same task we created earlier with the setInterval function, but we'll use the node-cron library this time.
As you can see, the syntax is very similar to the setInterval function. The only difference is that we use the cron.schedule function instead of setInterval. The first argument is the cron expression, which we will discuss later. The second argument is the callback function that will be executed every minute.
Cron Expression
"What are those asterisks?" you may be asking. Well, those are actually what is commonly referred to as a cron expression. A cron expression is a string that represents a schedule. It is made up of five or six fields that represent a specific time or time interval. At first, it may seem a bit confusing, but once you get the hang of it, it's pretty simple.
The five fields are minute, hour, day of the month, month, and day of the week. The sixth field is the year, but it is optional and is not used in this example. Spaces separate the fields, and each field can have a specific value or a range of values, and an asterisk can be used to represent all possible values. Let's take a look at the one we used in the previous example:
As you can see, we used an asterisk for each field, meaning the cronjob will run every minute. So, what if we want to run the cronjob every hour? We can simply change the first field to represent the hour:
This means that the cronjob will run every hour at the 0th minute. We can also use a range of values to represent a specific time interval. For example, if we want to run the cronjob every hour between 8:00 AM and 5:00 PM, we can use the following cron expression:
This means the cronjob will run every hour between 8:00 AM and 5:00 PM at the 0th minute. We can also use a comma to specify multiple values. For example, if we want to run the cronjob every hour at 8:00 AM, 12:00 PM, and 5:00 PM, we can use the following cron expression:
It's super easy to use, right? As the final example, let's create a cron expression that runs every minute on the 1st and 15th of every month:
Let's get creative
Now that we know how to use cron expressions, we can get creative and create some really cool cronjobs. Remember the example we used earlier where we wanted to send an email at 8:00 AM in our customer's local time? Well, we can actually use a cronjob to do that. Let's say we have a list of customers with their local time zone and email address. We can create a cronjob that runs every hour and checks the local time of each customer. Then, we can send the email if it's 8:00 AM in their time zone.
Let's create a cronjob that runs every hour and checks the local time of our customers. We can do this using the moment-timezone library. We can install it by running the following command in our terminal:
Now that we have everything set up, we can create our cronjob. We will use the node-cron library to create a cronjob that runs every hour and checks the local time of our customers. We will send out the email if it's 8:00 AM in their time zone.
As you can see, we can use cronjobs to create some really cool tasks. We can use them to send emails, run backups, or even run a script to update our database. The possibilities are endless.
Tracking cronjobs
One of the biggest problems with cronjobs is that they are very hard to track. Depending on the task, we may want to know when the cronjob was last run and even get notified every time it runs. For example, consider a cronjob that runs every hour to check the status of a server. If the server is down, we want to get notified immediately. This is where LogSnag comes in. LogSnag is a flexible and powerful event-tracking tool that allows us to track and monitor our cronjobs or other tasks. It's super easy to set up and use. We can start by creating a free account here.
Once we have created our account, we can create a new project. We can do this by clicking the "Create Project" button on the dashboard. Once we have created our project, we can then install the LogSnag library in our project. We can do this by running the following command in our terminal:
Now let's initialize LogSnag in our project. All we have to do is import the library and initialize it with our API key. We can get our API key by clicking the "Settings" button on the dashboard and heading to the API tab. We can then copy the API key and paste it into our project.
Now that we have everything set up, we can start by tracking our cronjobs via LogSnag. We can do this by using the publish method.
Now, if we let the cronjob run, we will start to see the events pop up on our LogSnag dashboard in real-time. We will also begin to receive push notifications on our Desktop and Mobile if we have the LogSnag app installed.
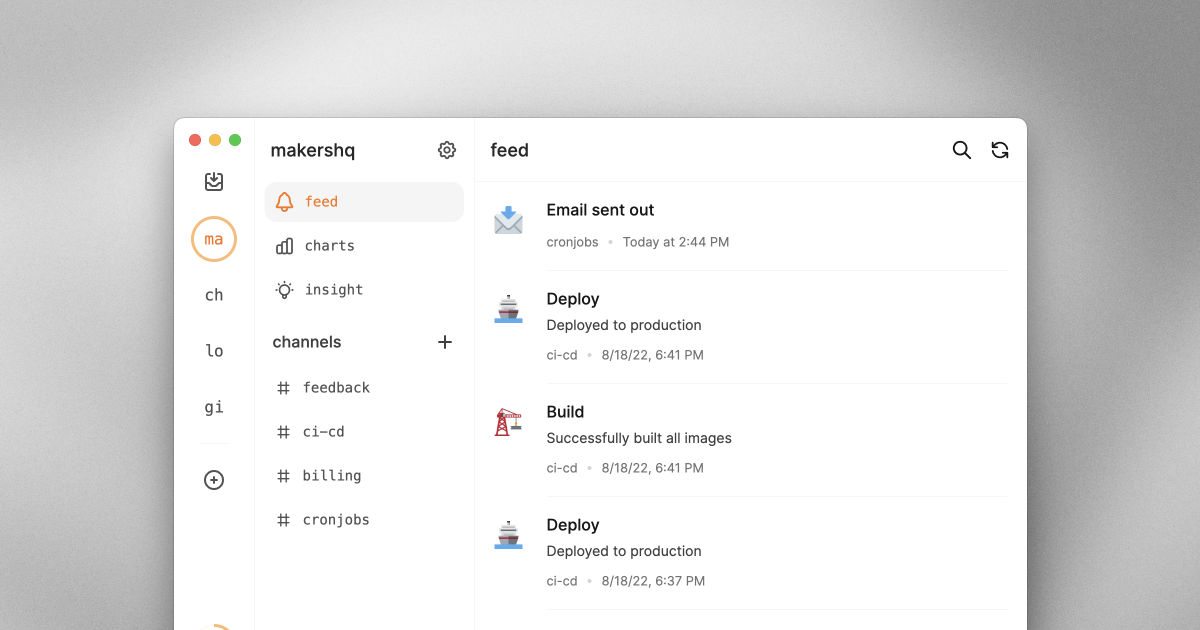
As you can see, LogSnag makes it super easy to track our cronjobs. We can also use it to track any other important event in our project, such as user signups, payments, database updates, server status, etc.
Creating a KPI dashboard with LogSnag and cronjobs
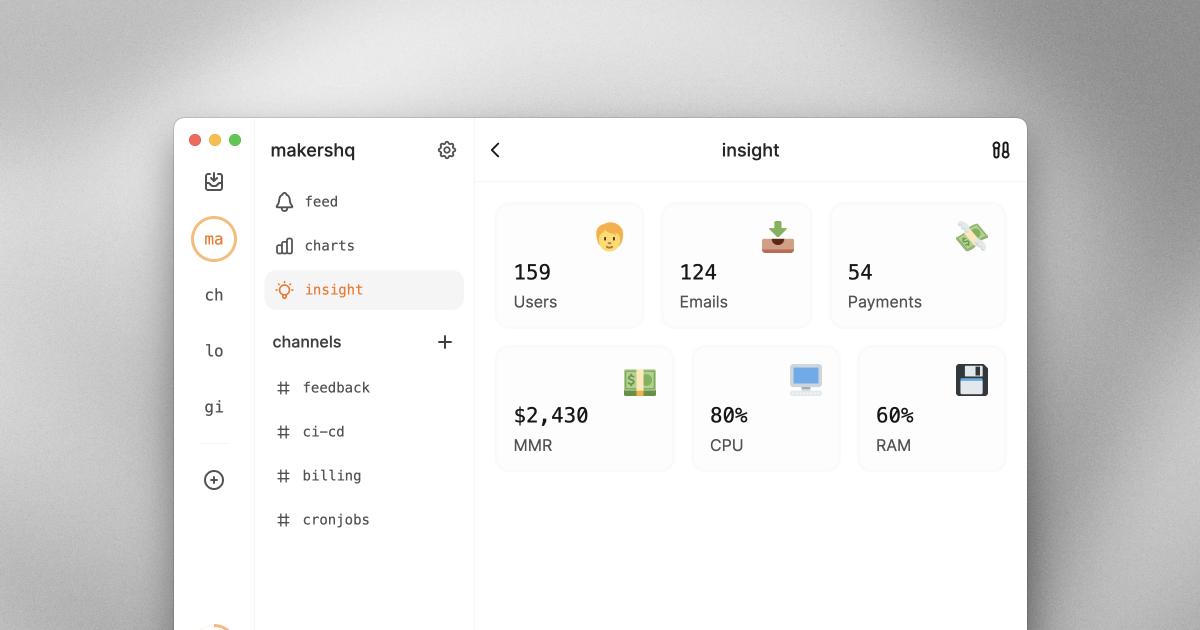
Let me show you how we can use LogSnag and cronjobs to create a simple KPI dashboard for our project. Let's say we are creating a SaaS product and want to track the number of users that sign up daily the number of payments, and the number of emails sent out. We can use LogSnag Insights to create a simple real-time dashboard for our project.
First, let's create a cronjob that runs every hour and pulls these metrics from our database. Then we can use LogSnag to track these metrics. We can do this by using the insight method.
If we run our cronjob, we can see these metrics being tracked in real-time via LogSnag Insights. We can also use LogSnag to track other important metrics in our project, such as server status, database updates, etc.
Advanced cronjob options
The node-cron library has a number of additional options that we can use to customize our cronjobs. Let's take a look at some of these options.
Running cronjobs at specific timezones
By default, the node-cron library uses the server's local time zone. We can change this by using the timezone option.
Start and stop cronjobs
Additionally, we may decide to start and stop our cronjobs at specific times. We can do this using the start and stop options.
The node-cron library will run the cronjob immediately after it is started. We can change this by using the scheduled option.
Conclusion
In this article, we learned how to use the node-cron library to create cronjobs in Node.js. We also learned how to use LogSnag to track our cronjobs and create a simple KPI dashboard for our project.
Here at LogSnag, we are building the next generation of developers' event tracking and monitoring tools. LogSnag provides many powerful features, such as real-time event tracking, push notifications, KPI dashboards, charts, funnels, journey tracking, and more.
To learn more about LogSnag, you can check out our website and sign up for a free account at LogSnag.
I hope you found this article helpful. Please feel free to contact me if you have any questions or suggestions.
Interested in LogSnag?